-

Qualtrics Platform -

Customer Journey Optimizer -

XM Discover -

Qualtrics Social Connect
File Upload Question
About File Upload Questions
The file upload question type allows respondents to upload a file along with their survey response. Using file upload, you can collect data that may not be available through standard survey questions.
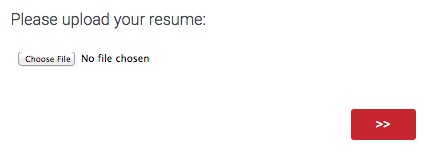
You can have as many file upload questions in your survey as you would like, however each question can accept only 1 uploaded file. Uploaded files can be up to 50MB. For security reasons, executable files (such as those ending in .exe) are not permitted.
File Upload Options
File upload questions are fairly straightforward, with 1 main adjustable option. You can restrict the type of file respondents upload. For example, if you are asking for a photo, you may want to restrict respondents from uploading spreadsheets.
To set this requirement, select Add validation in the question editing pane and choose the appropriate content type.
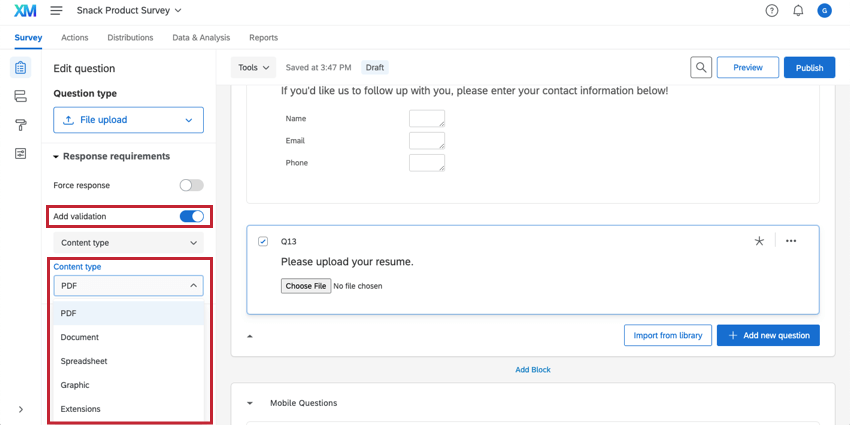
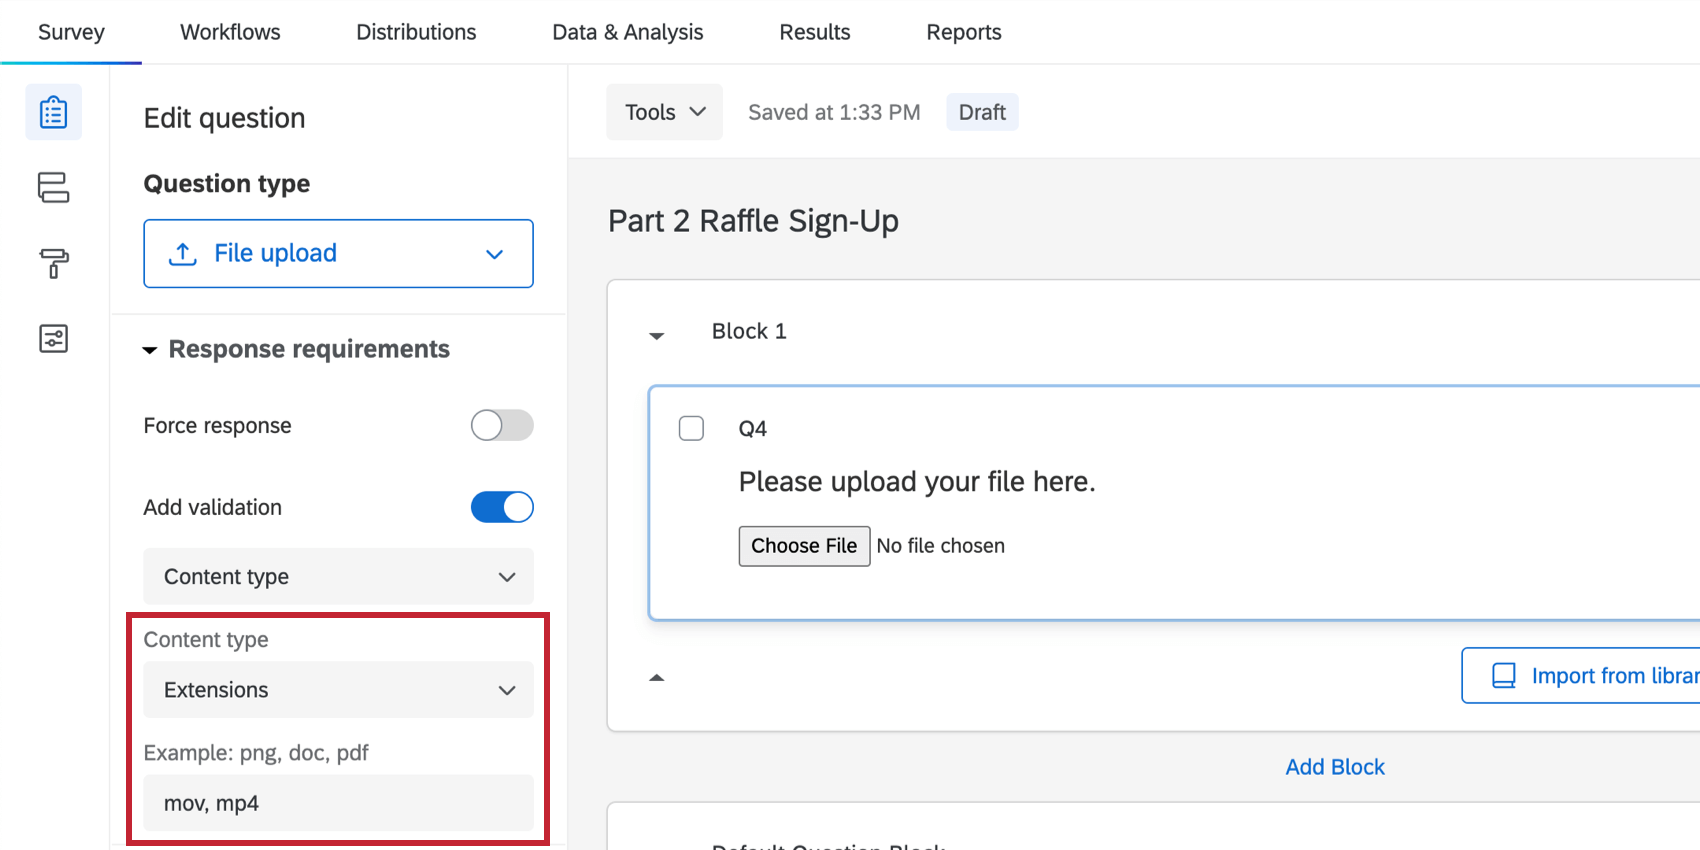
Content options are PDF, Document (DOC, DOCX, TXT, ODT), Spreadsheet (CSV, XLS, XLSX, ODS), or Graphic (JPG, PNG, GIF). You can also choose Extensions and type in your own custom allowed file extensions. Custom file extensions should not include the period before the file name and need to be separated by a space or a comma.
Example: To limit uploads to video files, you could type “mov, mp4” into the field. These file types are not case-sensitive, so “MOV, MP4” would also be fine.
File Upload Logic
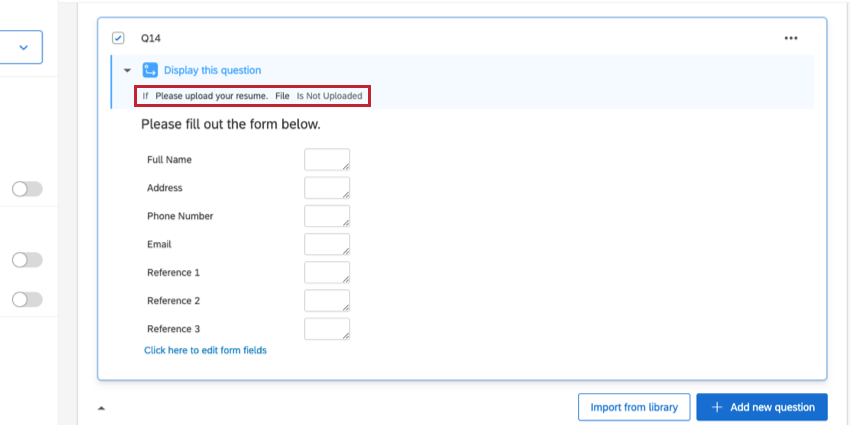
When using the file upload question, you can add special logic conditions in display logic, skip logic, branch logic, custom validation, and other areas. You can add logic based on the following:
- File: Base logic on whether a file was uploaded or not.
- File Size: Base logic on the number of bytes the uploaded file contains.
- File Type: Base logic on the type of file that was uploaded (PDF, Document, Spreadsheet, Graphic, Custom Extensions).
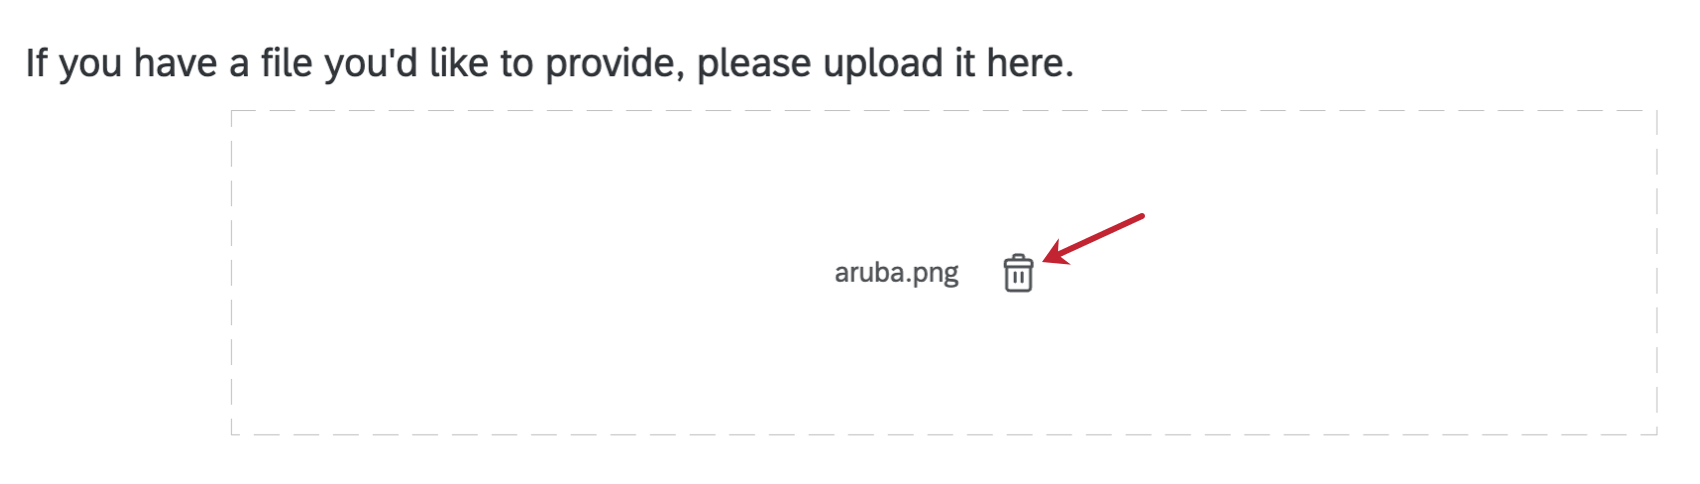
Example: In the image below, display logic has been applied so that the form only appears if someone did not upload a resume in the previous question.
Data Analysis
Once your responses have been collected, Qualtrics offers various ways you can analyze your response data. From the Reports tab, you can view aggregate data in pre-made reports as well as create your own reports from scratch. From the Data & Analysis tab, you can view and manage individual respondents’ data.
Results Visualizations
In the Results section of the Reports tab, the default table for a file upload is the paginated table. This table contains the following:
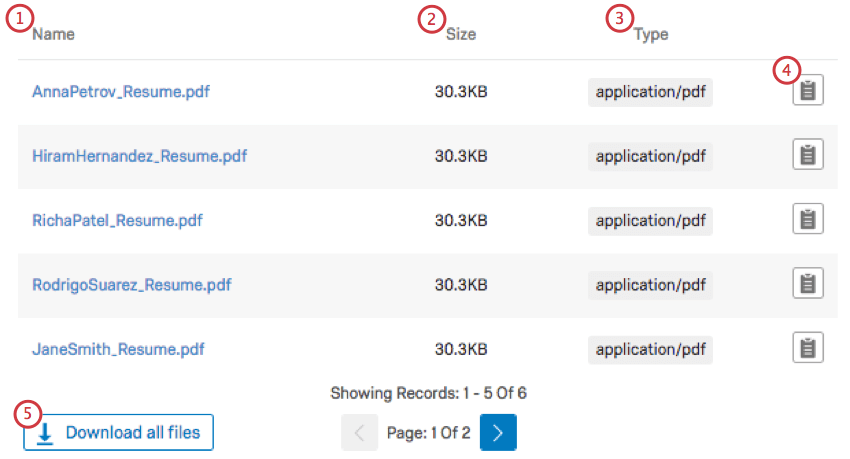
- Name: Click the name of the file to preview it.
- Size: The size of the file.
- Type: The type of the file.
- File icon: Click the icon to export the individual respondent’s answers to the other questions in the survey.
- Download button: Click Download all files to download all uploaded files.
If you select a data source other than (the file’s) Name or Thumbnail for your visualization, you can use other visualization types, but you will not be able to link to the uploaded files.
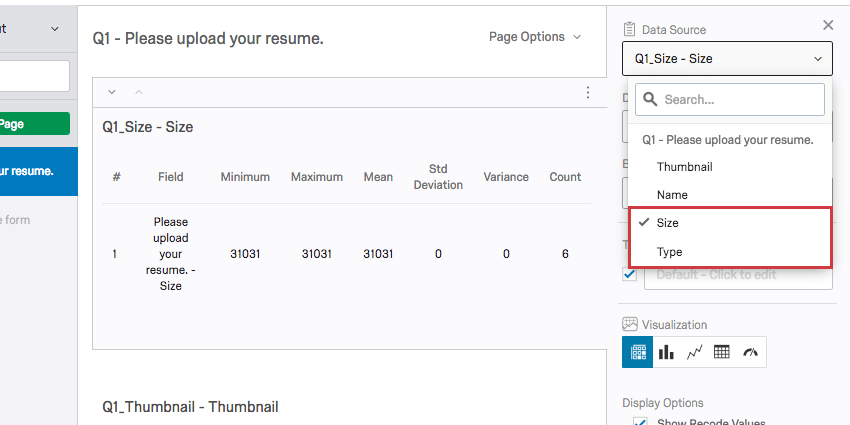
Reports Visualizations
In the Reports section of the Reports tab, you cannot create links to your file upload questions. However, you can still create a Results table that displays the different information for the file upload (size, type, etc.) altogether.
- Click Insert.
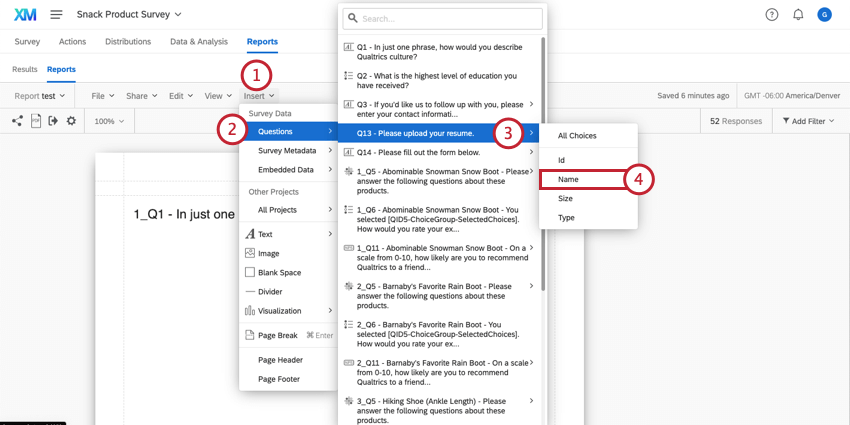
- Select Questions.
- From the list, highlight your file upload question.
- Select Name.
- Make sure your new table is highlighted. You can tell if the visualization editing pane appears on the right.
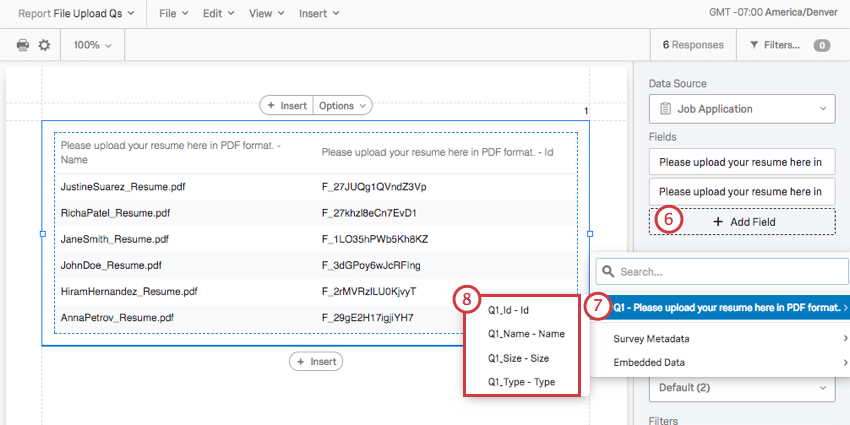
- Click Add Field.
- Highlight your file upload question.
- Select the field you want to add a column for. In the image, the Id is displayed.
- Repeat steps 5-8 for as many columns as you want to include.
For more information on editing a Results Table, please visit the linked support page.
Downloaded Data Format
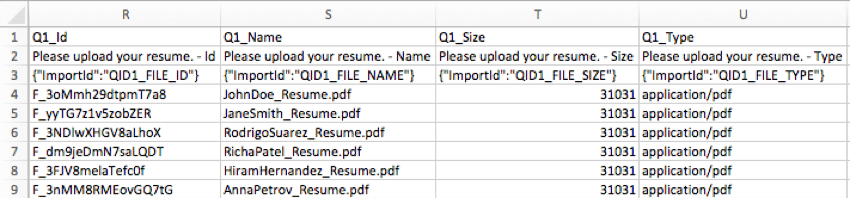
On the Data and Analysis tab, you can export a spreadsheet containing each respondent’s answers.
For file upload questions, there are four columns: the Id, Name, Size, and Type of file.
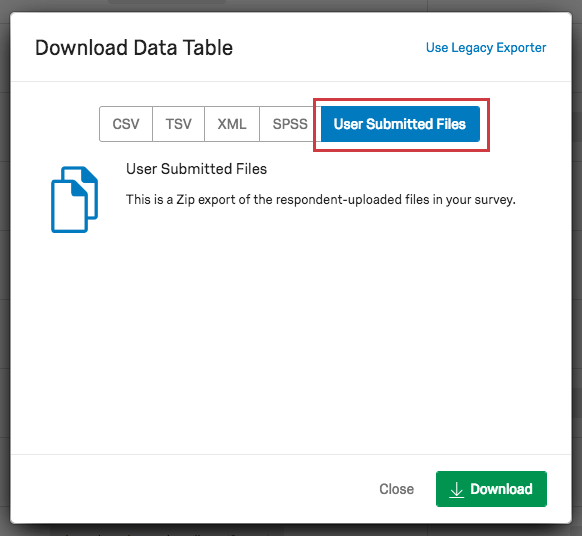
ZIP Download
Rather than downloading your uploaded files in spreadsheet form, you can download a ZIP file with all the files uploaded by your respondents. When exporting your data in Responses, just choose the User Submitted Files format.
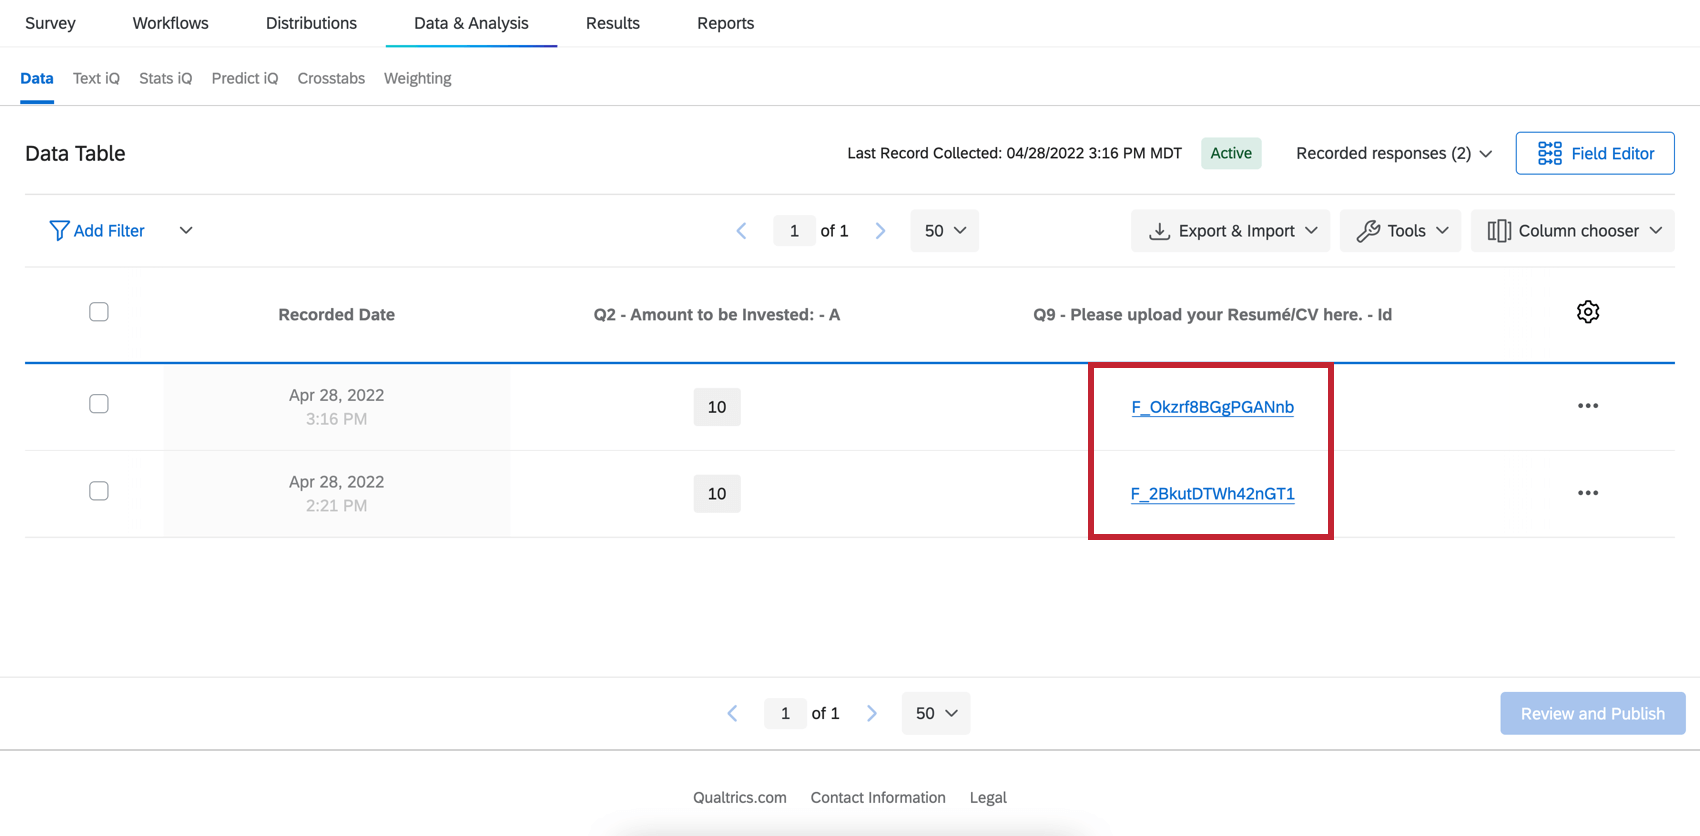
Data Section
You and any collaborators with access to the data can easily download the files in the Data section.
- In the Data & Analysis tab, click Column chooser.
- Hover your cursor over the file upload question.
- Select Id.
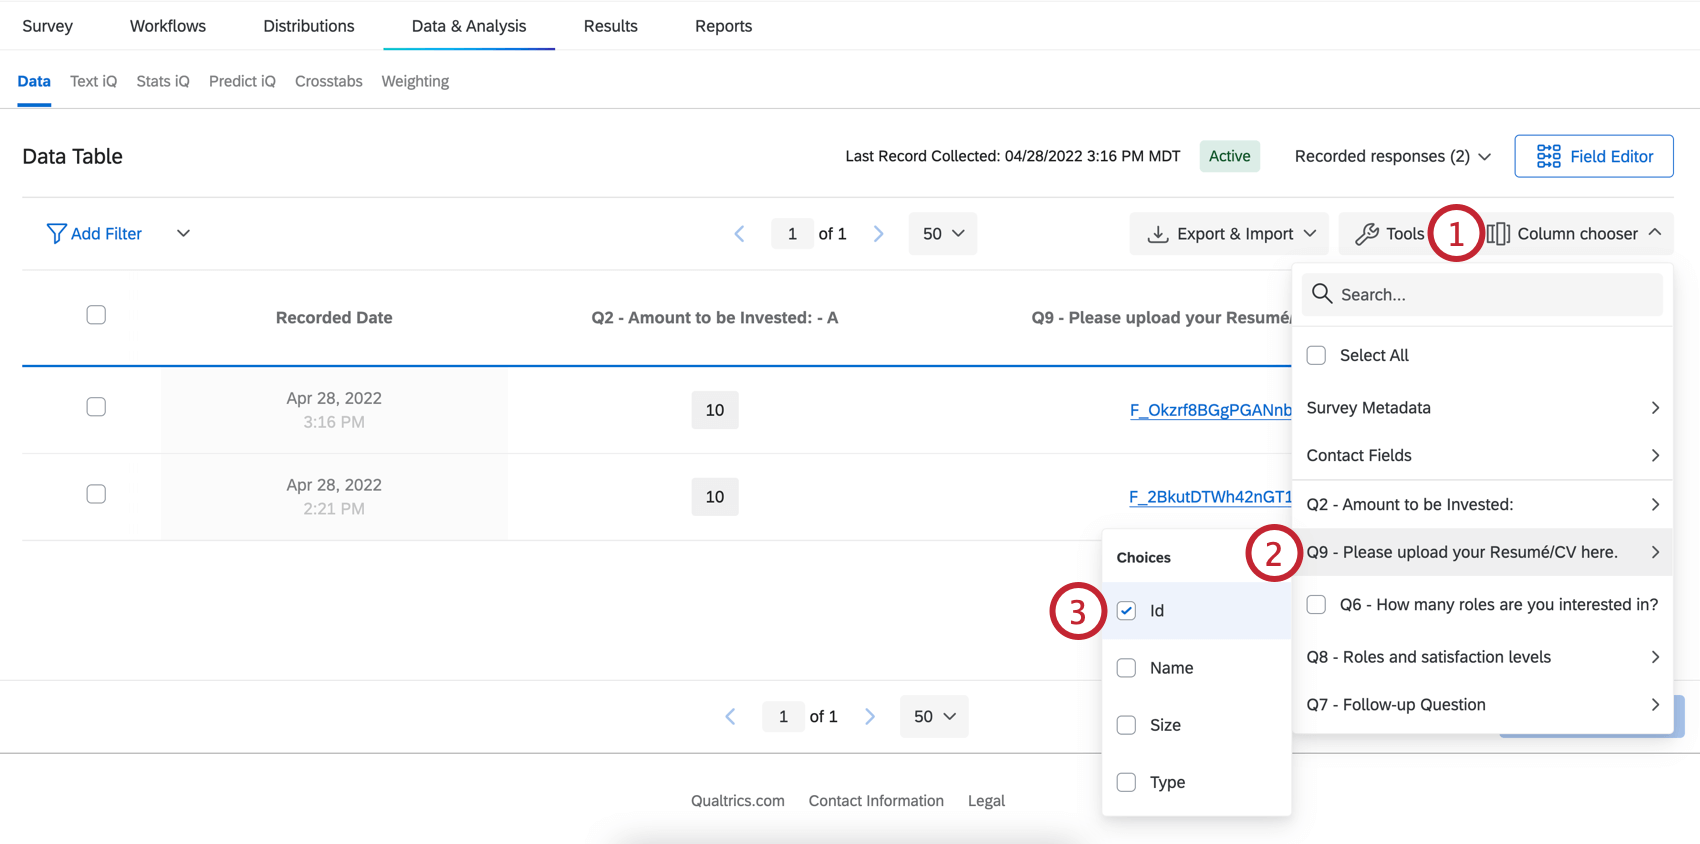
- Click the hyperlinked Id to download the file.
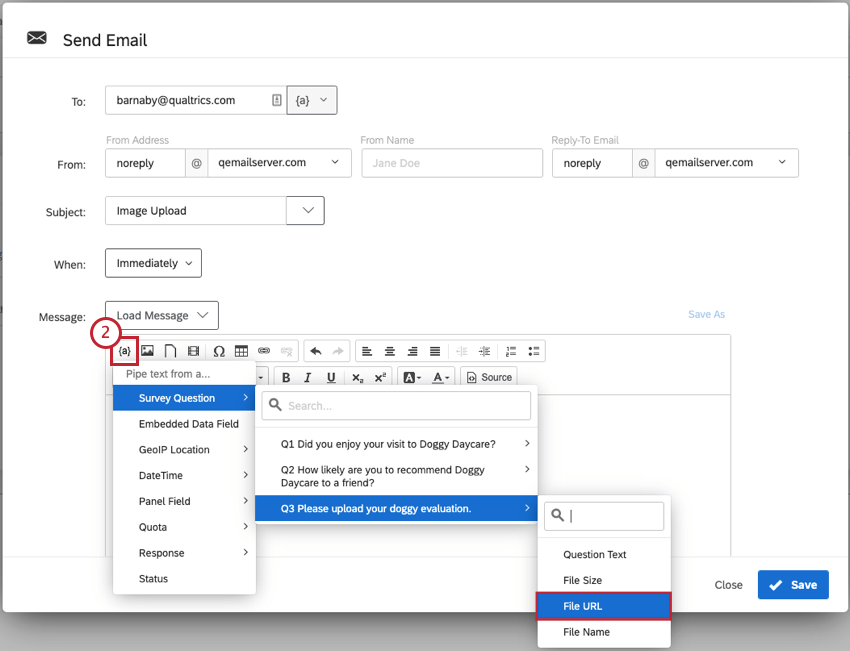
Inserting an Uploaded Image File into an Email Task
It’s possible to include uploaded image files in an email task by modifying the email HTML. This will require a bit of coding, but can be accomplished by following the below steps.
- Insert any image into the email task’s rich content editor.
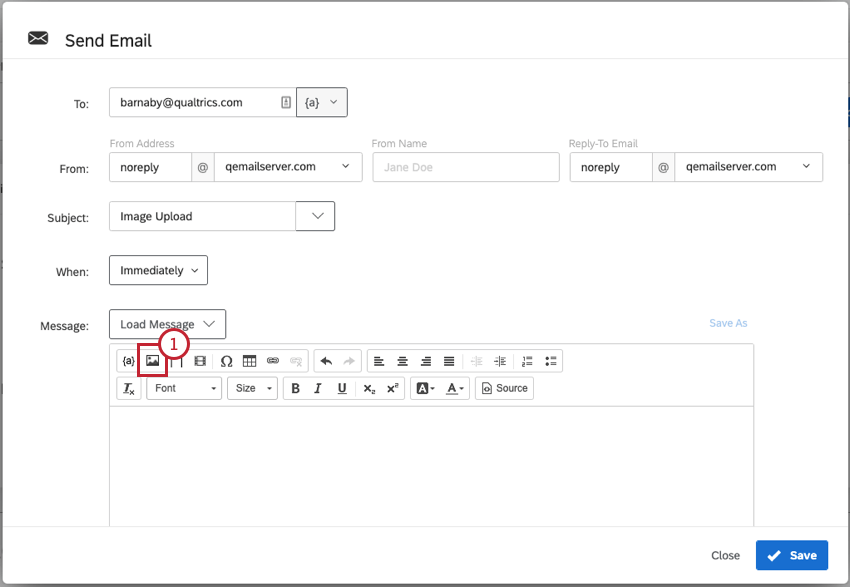
- Get the piped text for the uploaded file URL. Copy this code for later use.
- Access the Source view of the rich content editor to view the image’s HTML.

- Replace the image source (text between the quotation marks and after src=) with the piped text for the uploaded image URL.
Screen Capture
Screen capture allows respondents to attach a screenshot of the site they are viewing when taking a survey through a Website / App Feedback project. This question type is only available to users that have purchased access to Website / App Feedback projects. The screen capture question type allows respondents to illustrate where on the site they are referring to and gives the ability for the respondent to highlight and blackout certain parts of their image. This makes it possible to see exactly what your website visitors are seeing when they give feedback on the site.
For more information, please visit the Screen Capture support page.